

Scheduler
On this page
The Scheduler runs your bot for you while you're away. You give it a list of steps, press Start, and it works through them in order.
This guide sets up the most common routine: farm a map, buy potions when you run low, and repeat. It takes about five minutes.
You'll find the Scheduler in the web menu at game.violet.cx. Open your character and go to the Schedule tab.
1. Make a schedule
Click New at the top. You get an empty schedule. To give it a name (we'll use "Farm + restock"), open the ⋯ menu and choose Rename.
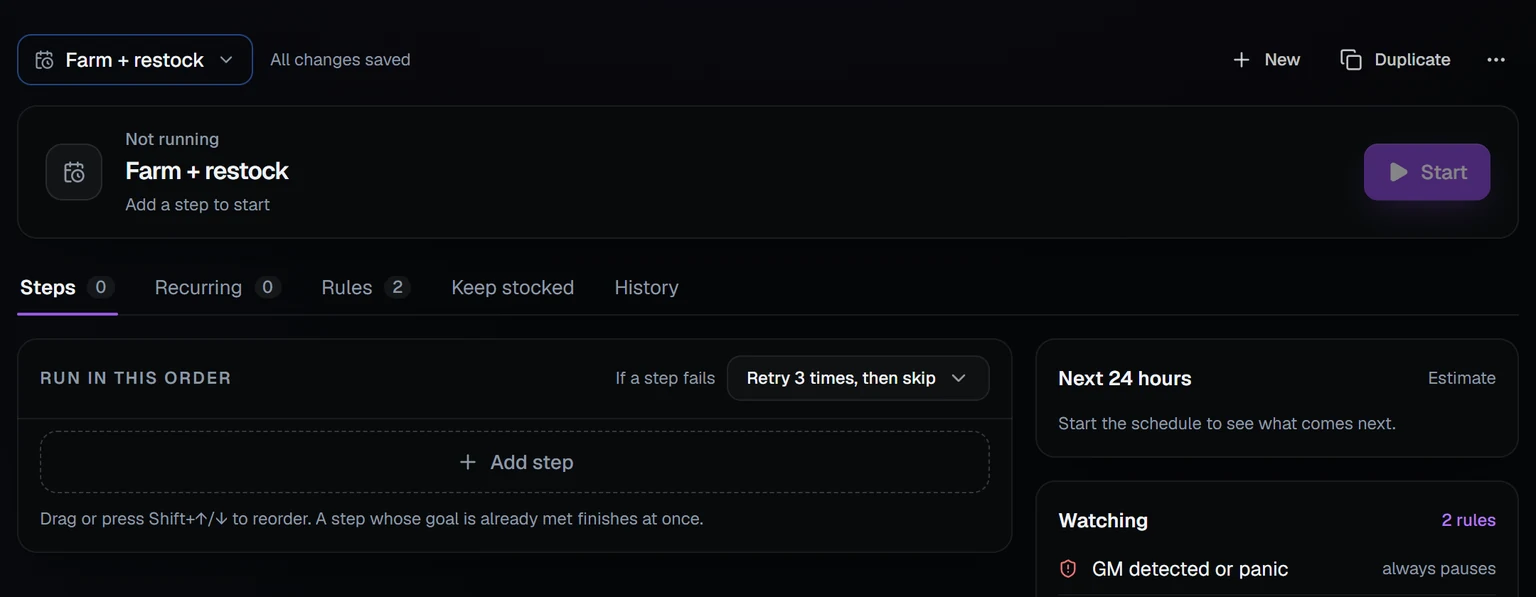
2. Add a farming step
Click Add step and choose Auto Farm.
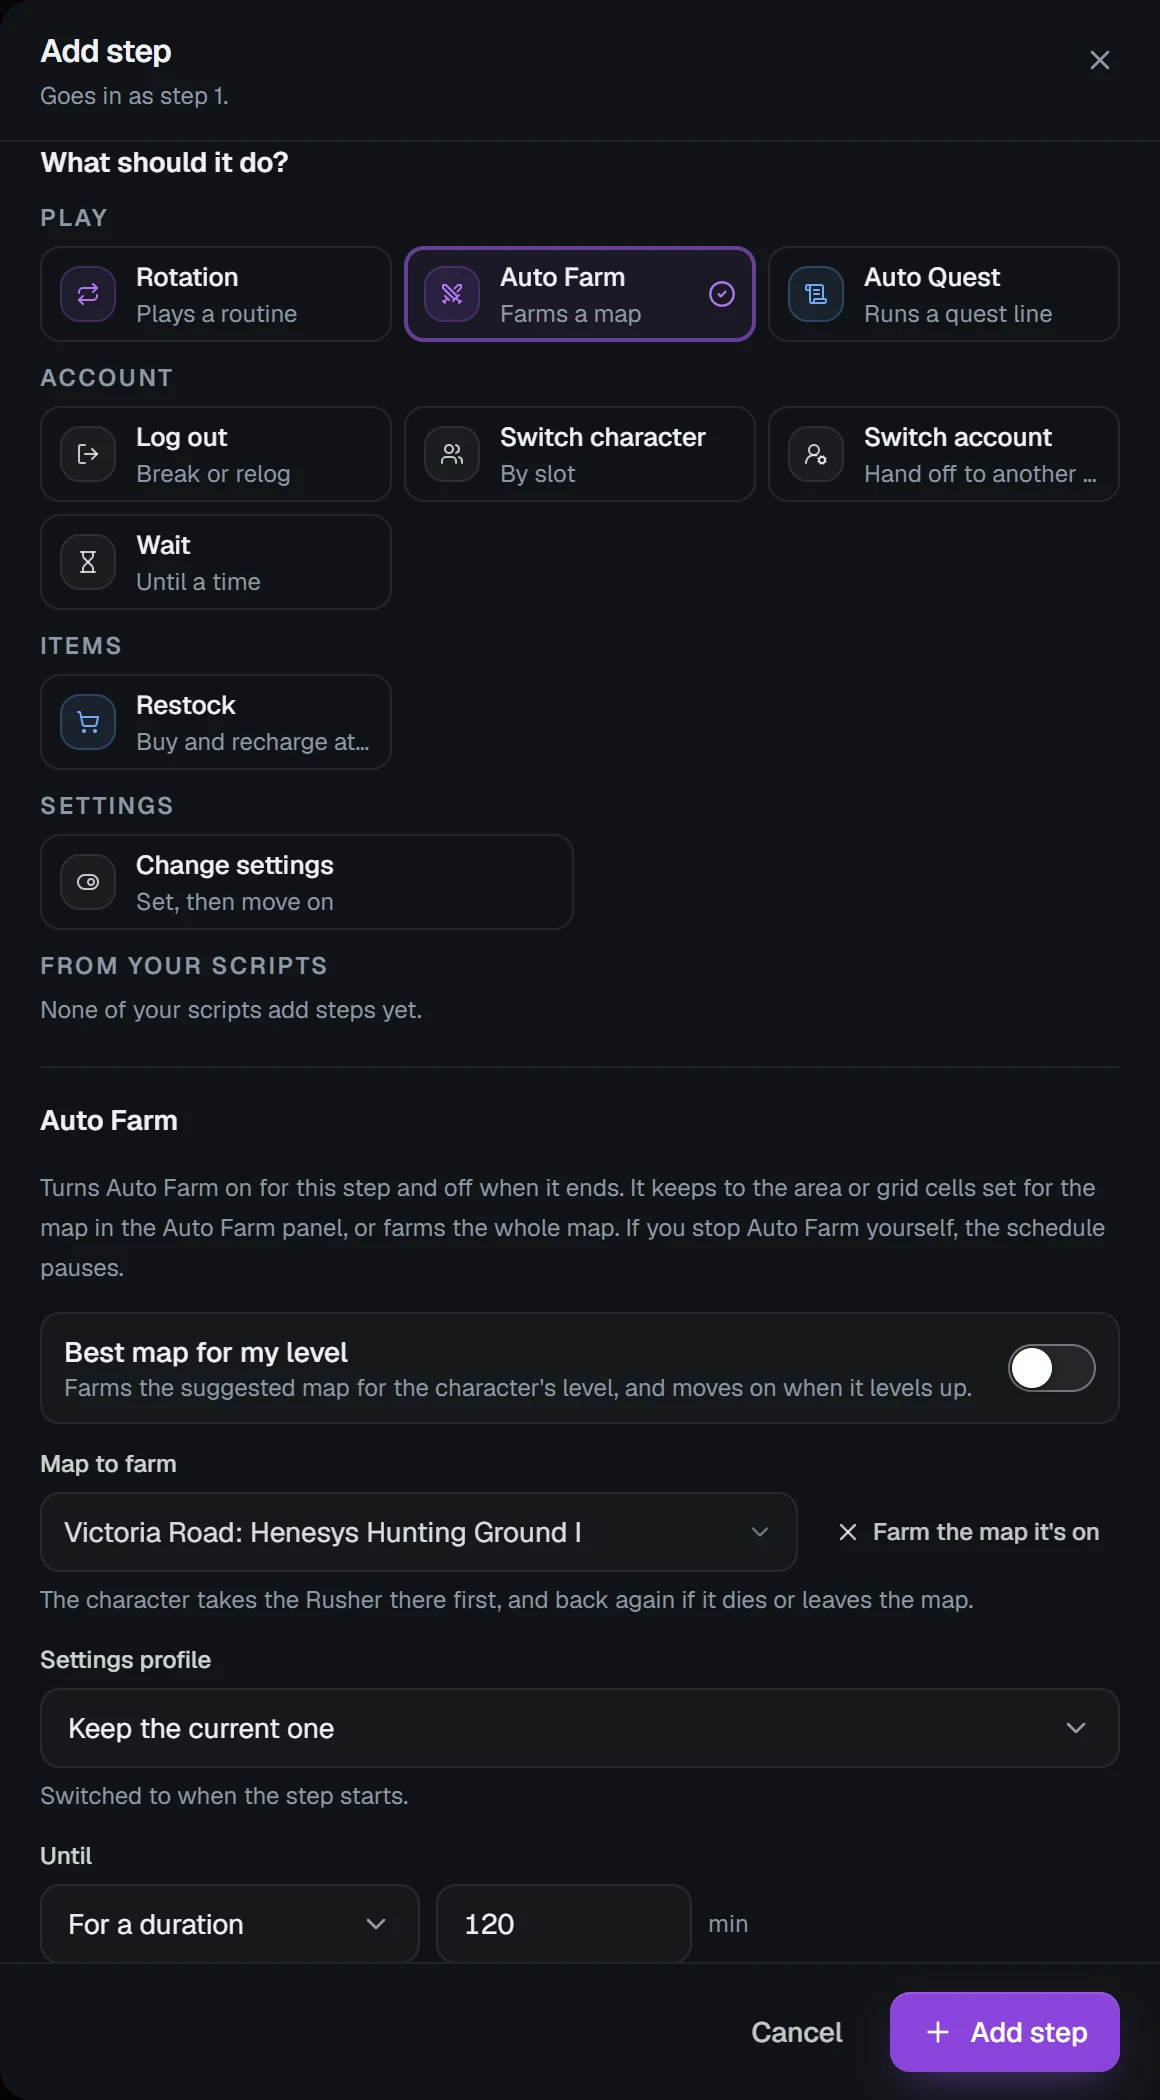
Then fill it in:
- Map to farm: type the map name and pick it, e.g. Henesys Hunting Ground I. Leave it empty to farm whatever map you're on.
- Until: choose For a duration and type
120for 2 hours. - Then: leave it on Go to the next step.
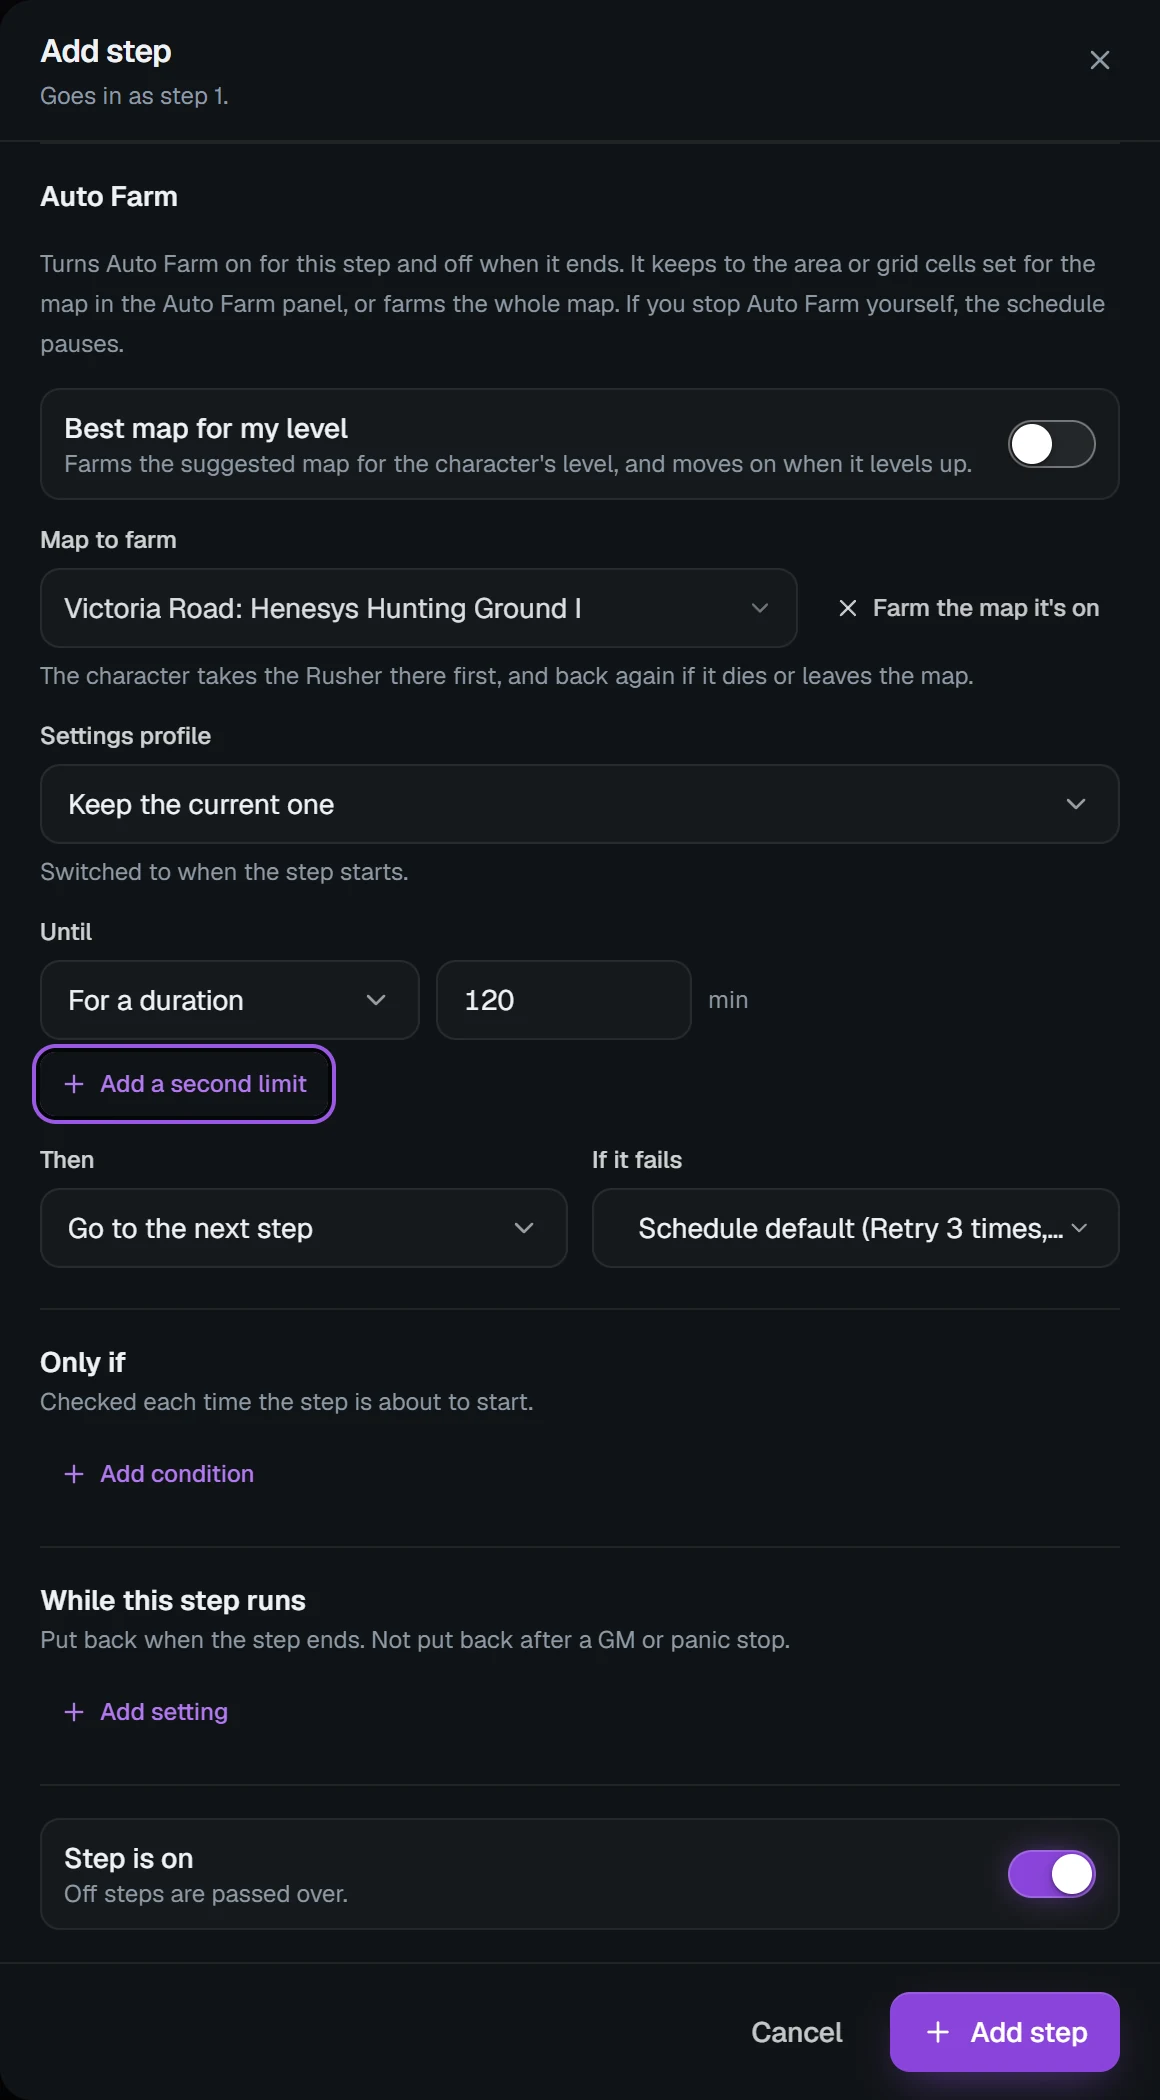
Click Add step at the bottom to save it.
Turn on Best map for my level. It picks a good map for your level and moves on as you level up.
3. Add a restock step
Click Add step again and choose Restock.
- Items to buy: click Add item, then pick your potions. Each number is how many you want to have in total, e.g.
300. - Keep at least: the bot never spends below this, e.g.
1M. - Shop: search the town (e.g. Henesys General Store), then pick the shopkeeper.
- Then: choose Go to step 1 so it goes back to farming.
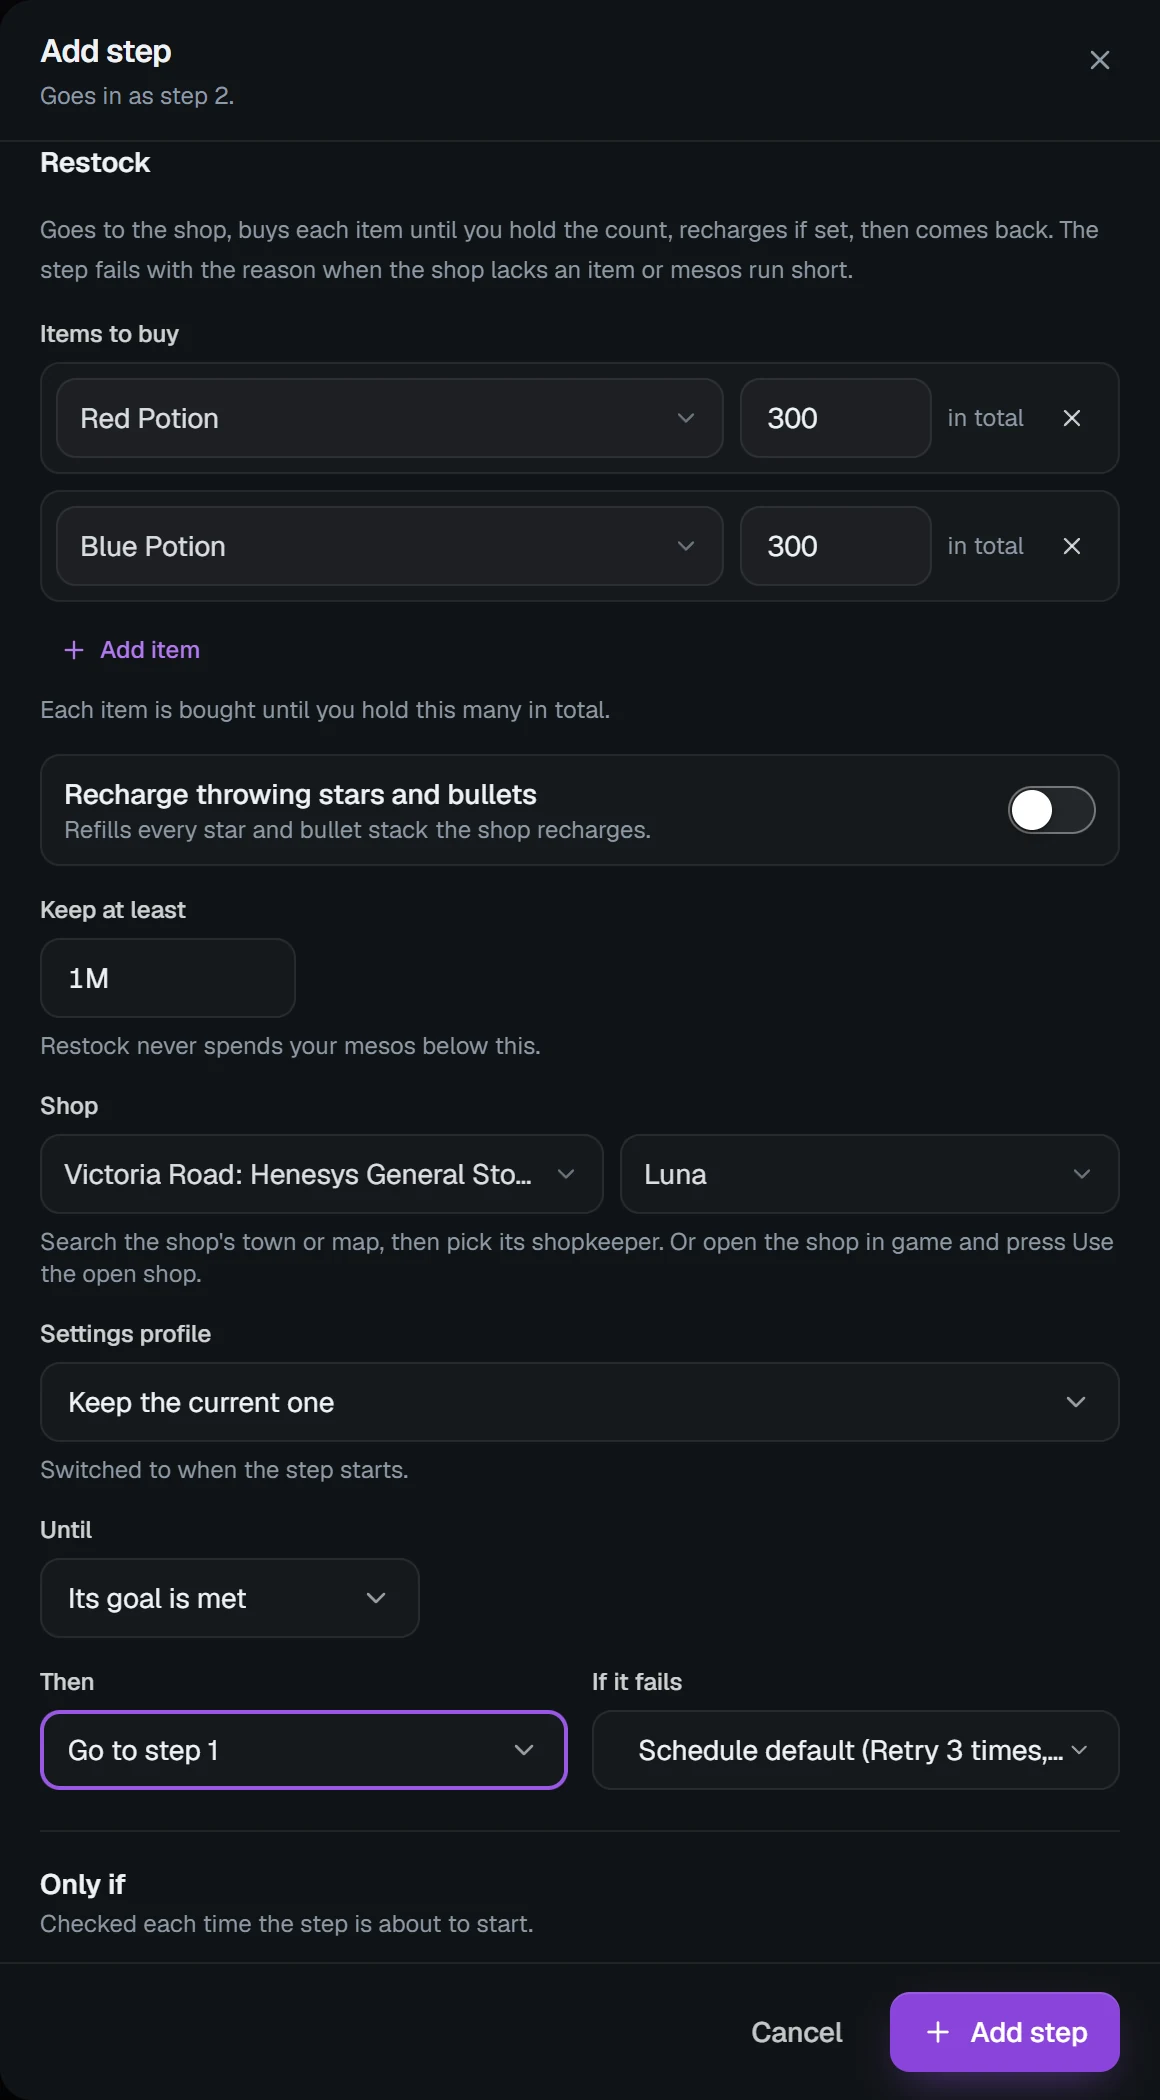
Click Add step. Your schedule now looks like this:
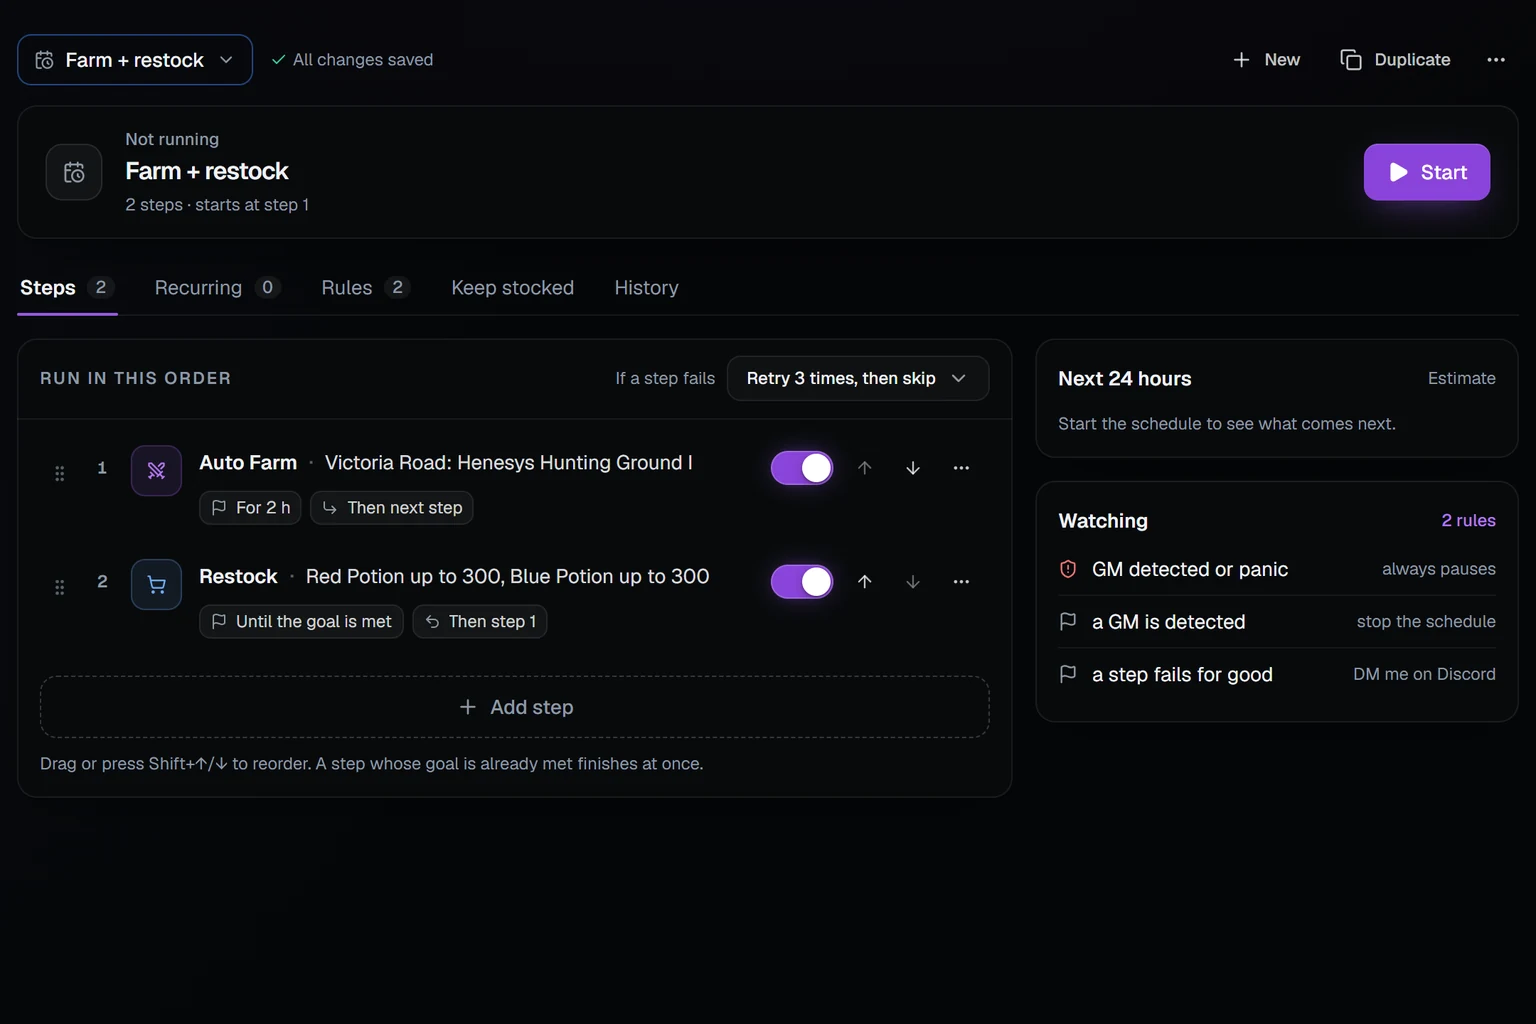
That's a full loop: farm for 2 hours, buy potions, farm again.
4. Top up whenever you run low (optional)
The restock step only runs every 2 hours. If you burn potions faster than that, use Keep stocked. It sends the character shopping the moment something drops too low, then goes back to what it was doing.
Open the Keep stocked tab and click Set up. For each potion set:
- low: go shopping when you have fewer than this, e.g.
50 - full: buy back up to this, e.g.
300
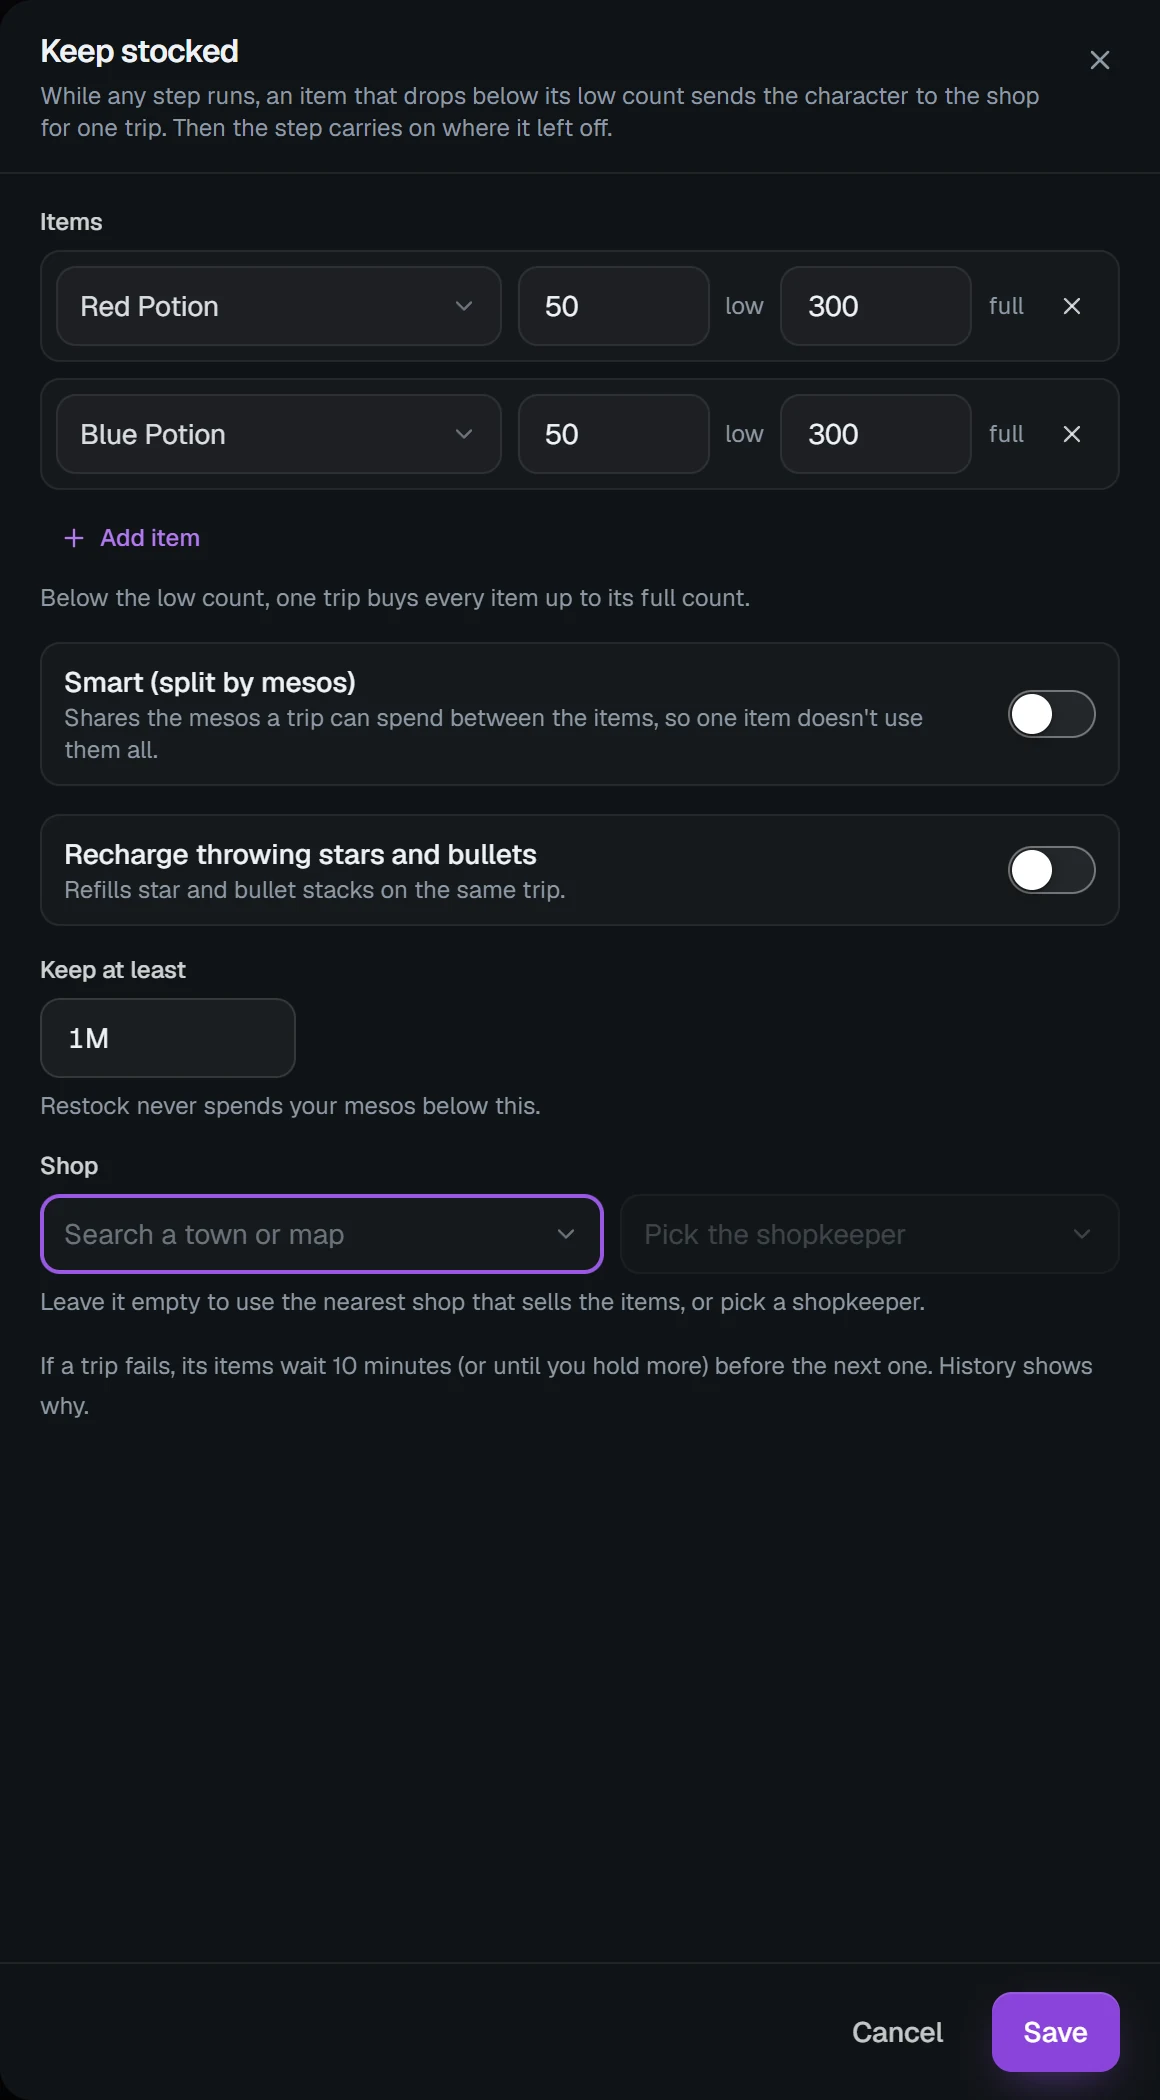
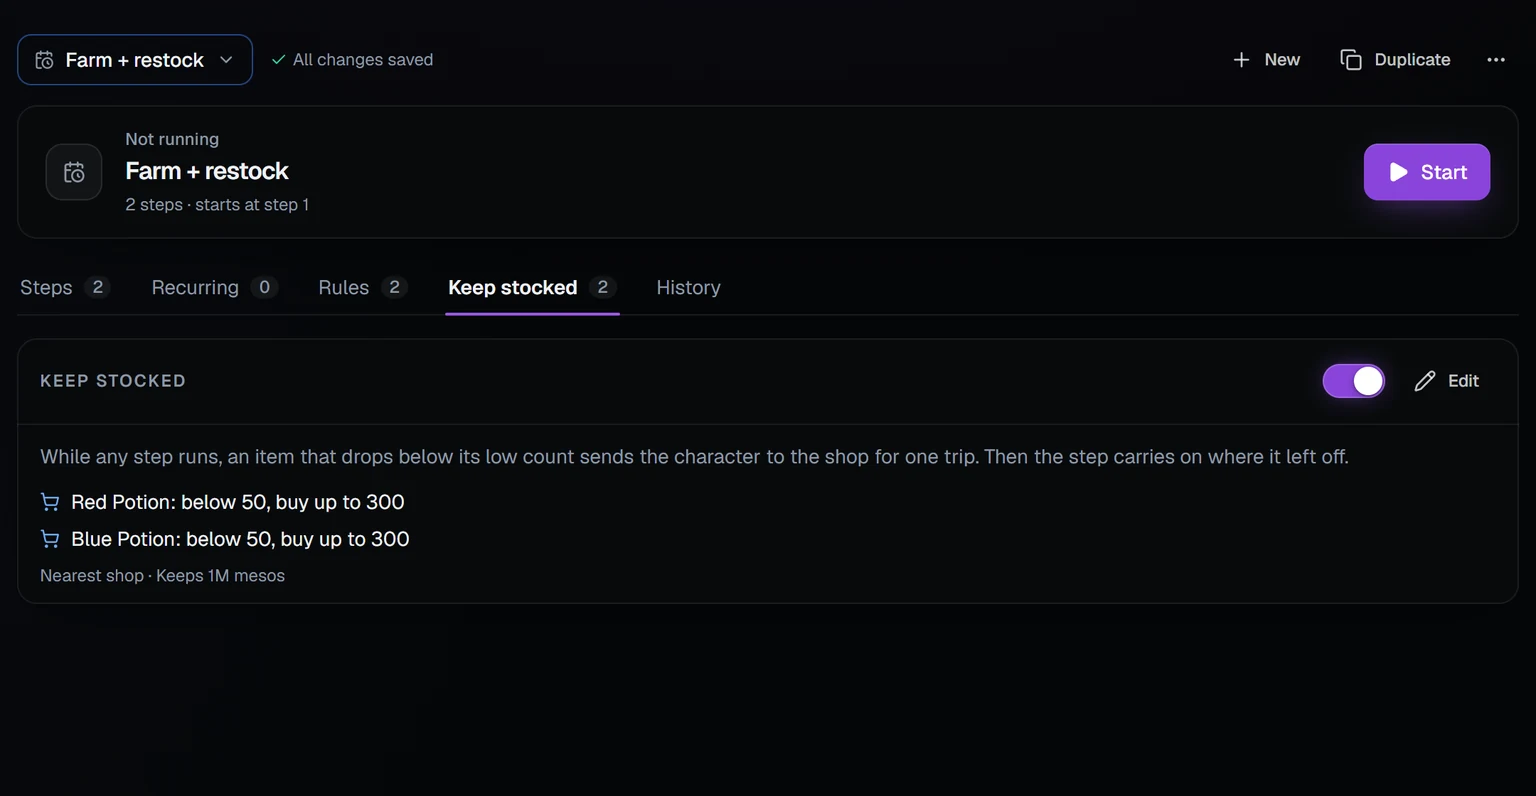
Leave Shop empty to use the nearest shop that sells them. Click Save, and make sure the switch is on.
5. Press Start
Click Start. The top card shows what it's doing right now and how long is left, and Next 24 hours on the right shows what's coming up.
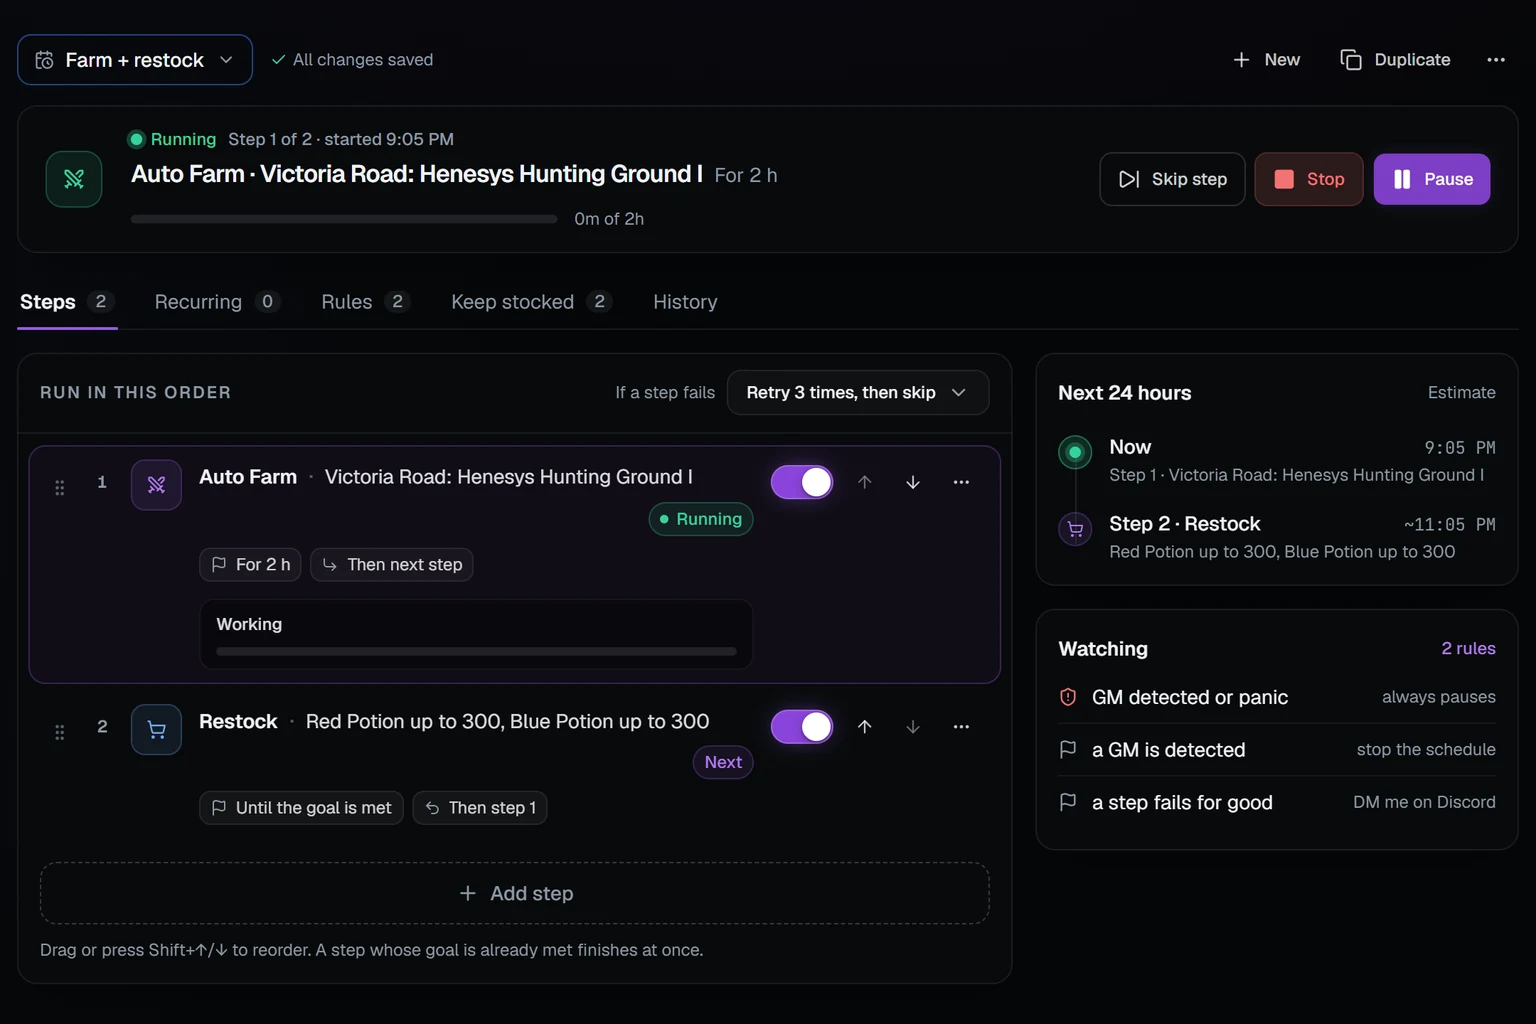
Use Pause, Skip step or Stop any time. Changes you make while it runs apply the next time you start it.
6. Check what happened
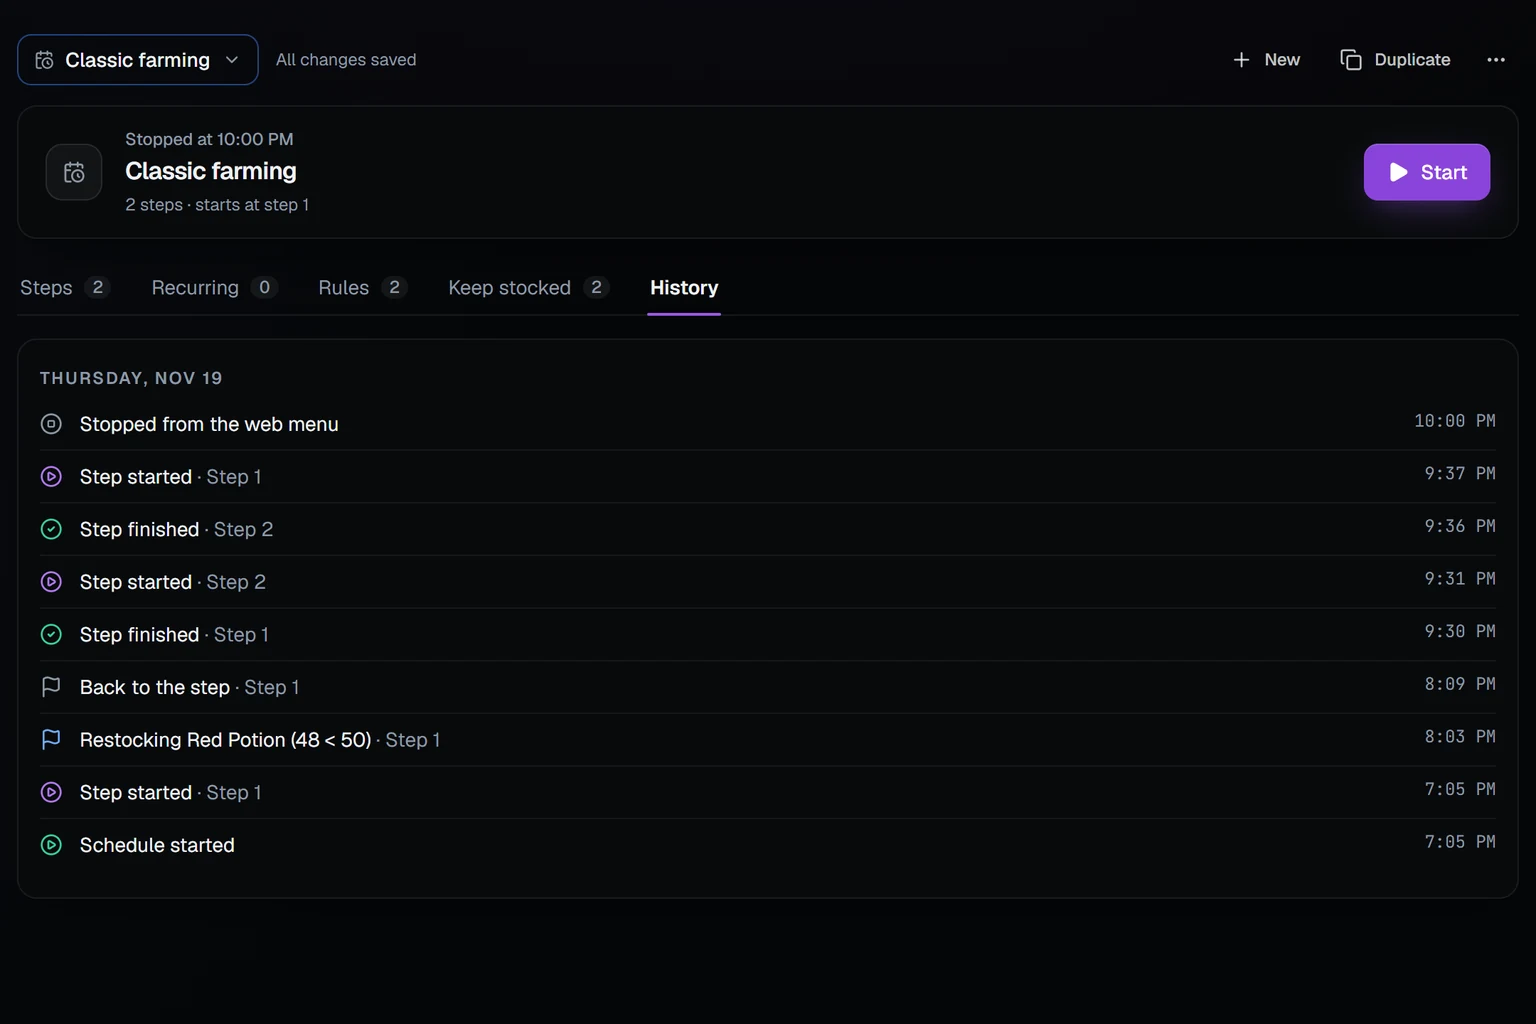
The History tab lists everything the schedule did, with times. If something didn't go the way you expected, look here first.
More you can do
Once the basic loop works, these are worth a look:
- Breaks: in Recurring, click Add recurring task. The default is a short log-out break every few hours of play.
- Safety rules: in Rules, you can stop or pause the schedule if a GM shows up, during quiet hours, or after a number of hours played. Rules can also DM you on Discord, e.g. when a step fails. Pausing on a GM or panic is always on.
- A second limit: on any step, Add a second limit ends it on whichever comes first, e.g. 2 hours or level 60.
- More step types: Rotation, Auto Quest, Kami, Log out, Switch character, Switch account, Wait and Change settings. Which ones you see depends on your game.
- Templates and sharing: New from template starts from a ready-made schedule. ⋯ → Share… gives you a code a friend can add with Add from a code.
Scripts can add their own steps and conditions to the Scheduler. See the Scheduler API.